One of the most common mistakes when troubleshooting a non-working pinball machine is jumping straight to the MPU.
The display is blank.
The game won’t boot.
Nothing appears to be happening.
“It must be the MPU.”
Maybe. But before you start replacing boards and chips, don’t forget my favorite troubleshooting rule:
ASAP – Always Start at Power.
A pinball machine can have all sorts of symptoms when the power supply isn’t doing its job, and chasing those symptoms often leads to wasted time and frustration.
Recently, I worked on a Gottlieb Diamond Lady (System 80B) that appeared completely dead. No boot sequence, no gameplay, and no obvious signs of life. What initially looked like a major MPU problem turned out to be a series of smaller issues hiding behind a power failure.
Let’s walk through the troubleshooting process that brought this Diamond Lady back to sparkling.
Step 1: Verify Power Supply Voltages
Before testing anything else, I checked the power supply.
Important: When measuring the +5VDC generated by the power supply, disconnect J2 from the power supply first. This isolates the power supply from the rest of the game and prevents downstream problems from affecting your readings.
In this case I found:
- No +5VDC
- No +12VDC
With both voltages missing, the MPU never had a chance to boot.
At this point there is no reason to troubleshoot CPU boards, ROMs, or displays. The game needs proper power first.
Step 2: Follow the Power Path
Tracing the power circuit led me to the transformer area where I discovered a burnt connector.
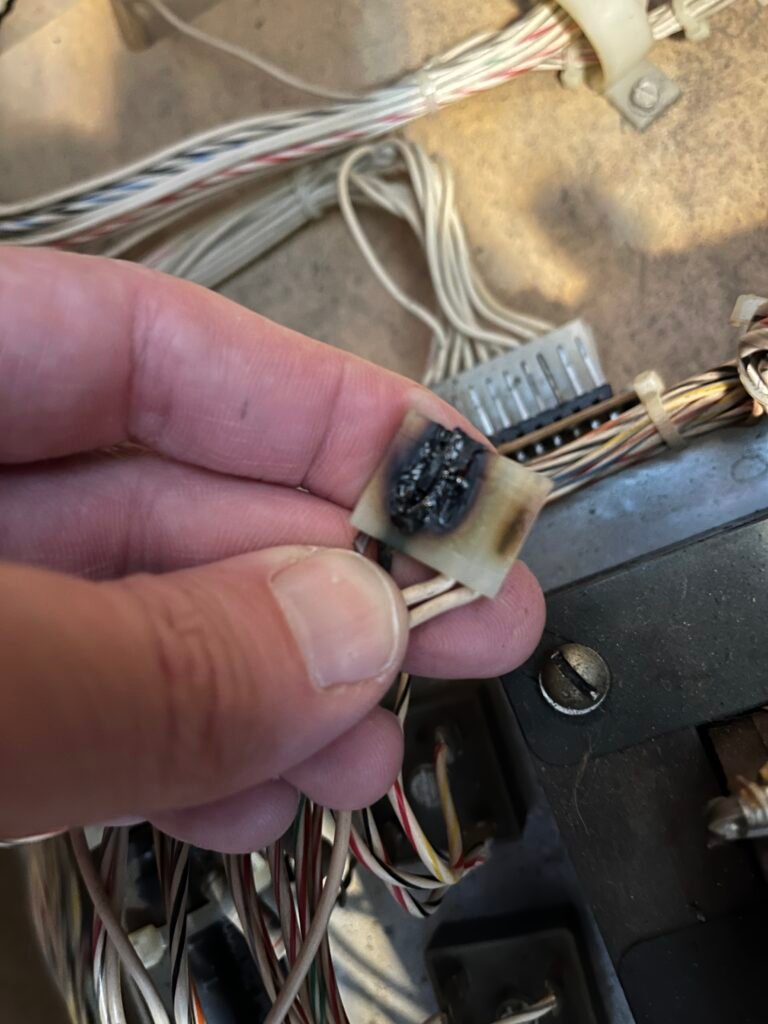
The bridge rectifiers all tested good, but the damaged connector was preventing power from reaching the rest of the system correctly.
Repairs included:
- Rewiring the damaged connector
- Replacing damaged terminals
- Removing an old jumper that had been installed between bridge rectifiers
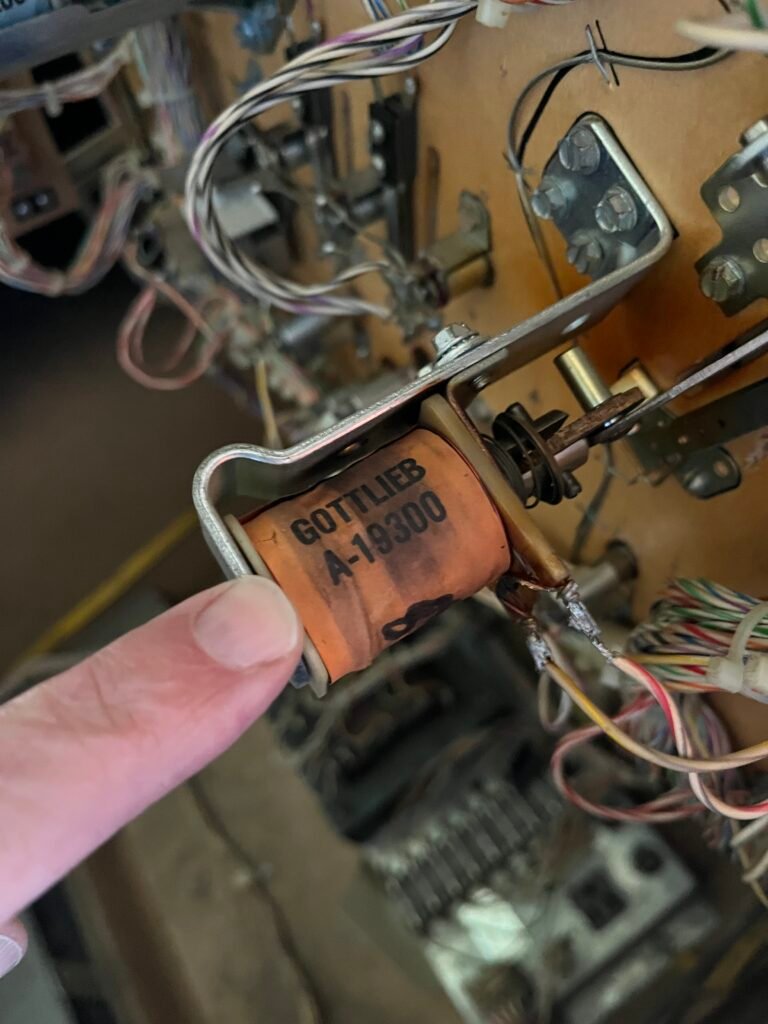
- Replaced burnt kicker coil
After repairing the power path, the game finally booted, but would not start a game.
Progress.
Step 3: New Symptoms Appear
Once the game powered up, several additional problems became apparent:
- No switch activity
- No solenoid operation
- Flippers inactive in attract mode and game mode
- Slingshots not firing during gameplay
This is a common situation when bringing a dead game back to life.
The original failure can hide additional problems that only become visible after power is restored.
Step 4: Inspect for Battery Damage
The MPU had suffered battery corrosion.
Battery leakage is notorious for attacking traces, connectors, and switch matrix circuitry.
Repairs included:
- Removing the original battery
- Cleaning corrosion damage
- Performing the recommended ground modification
- Repairing corrosion around the switch matrix connector area
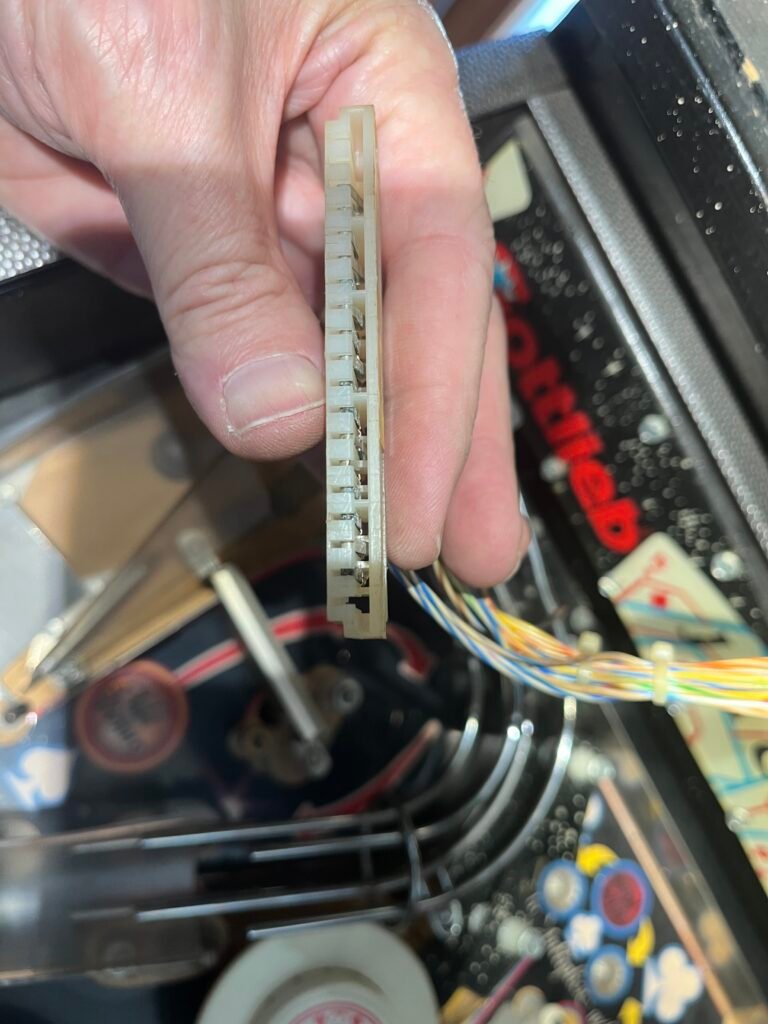
The A1-J6 connector showed significant corrosion and damaged pins.
Since A1-J6 carries switch strobes and returns, any damage here can disable large portions of the switch matrix.
The connector was repinned and rebuilt.
After the repair, sound returned and the game became much more functional.
However, some switch problems still remained.
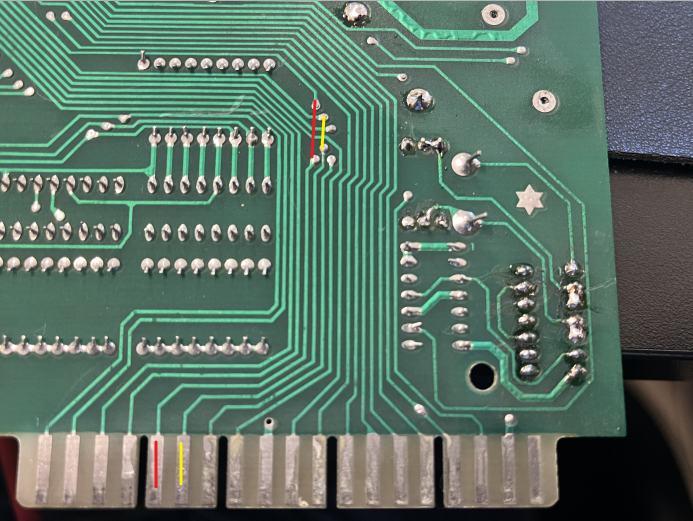
Step 5: Verify the Switch Matrix
When portions of a switch matrix stop working, continuity testing becomes your friend.
Testing showed that most switch strobes and returns had continuity from the connectors to the decoder chips.
However, two strobe lines failed:
- S4
- S5
Both lines showed no continuity between the connector and their expected destinations.
Every other strobe and return line tested correctly.
That narrowed the fault considerably.
Instead of chasing the entire switch matrix, attention could now focus on the specific damaged traces, connectors, or circuit paths associated with S4 and S5.
This is a perfect example of why systematic testing beats guessing.
Conclusion
This repair reinforced several important troubleshooting principles.
1. Start with Power
No +5V means no MPU operation.
No MPU operation means every symptom that follows is potentially misleading.
2. Dead Games Often Have Multiple Problems
Finding one failure doesn’t mean you’re done.
The burnt power connector was only the first issue.
Battery damage created an entirely separate set of problems.
3. Corroded Connectors Matter
Many switch matrix failures originate at connectors rather than failed ICs.
Always inspect and test connector pins before replacing chips.
4. Use Measurements to Narrow the Problem
Rather than replacing parts at random, continuity testing quickly identified the exact switch matrix lines that were failing.
Good troubleshooting isn’t about finding the answer immediately.
It’s about eliminating possibilities until only the answer remains.
What looked like a dead Diamond Lady was actually several smaller problems hiding behind a power supply failure. Starting with power, following the evidence, and fixing one issue at a time brought this System 80B back to life.
Have a pinball machine that isn’t booting? Contact Troxel Repair for professional pinball and arcade repair services in Nebraska.