Introduction: How to Troubleshoot a Pinball Machine
In my latest YouTube video, I walk through the initial steps I take when I troubleshoot a pinball machine when it first arrives in my shop. If you’re a fellow enthusiast or repairer, this video is a perfect guide to understanding how I approach the restoration process. Here’s a breakdown of the key points covered in the video, along with some extra details I’ve added for clarity. Feel free to download the Troubleshooting Guide.
Step 1: Visual Inspection
The first thing I always do when a machine comes into the shop is perform a visual inspection. This step is crucial because it helps me identify any obvious issues like burnt coils, loose wires, or any metal-on-metal contact. I also check the plastics for cracks or chips.
During this phase, I go over the playfield and make sure the pop bumpers, rubbers, and posts are in good shape. If they need replacing, I’ll make a note of that. A good visual inspection helps catch anything that might affect gameplay before I dive into more technical repairs.
Checking the Backbox
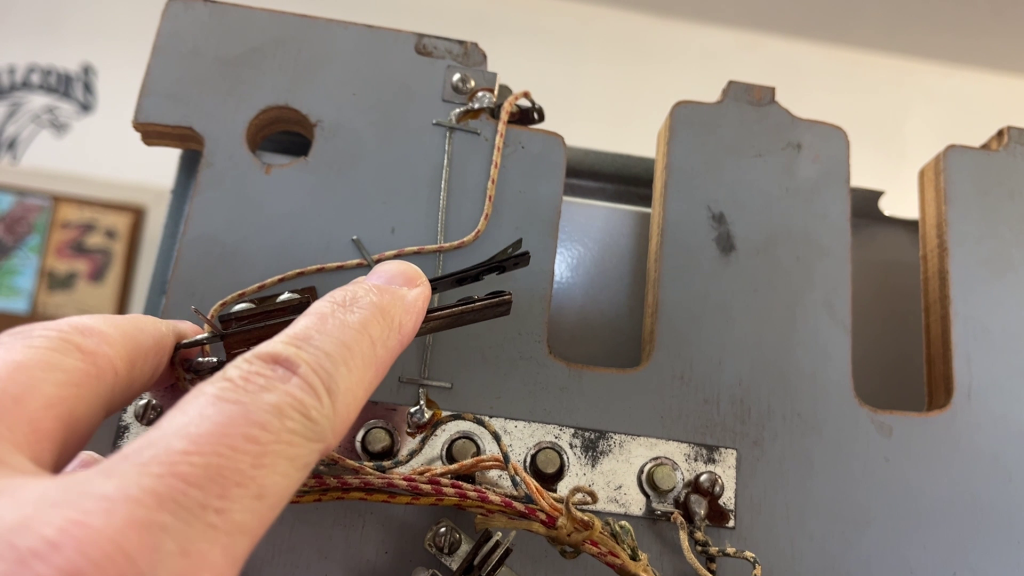
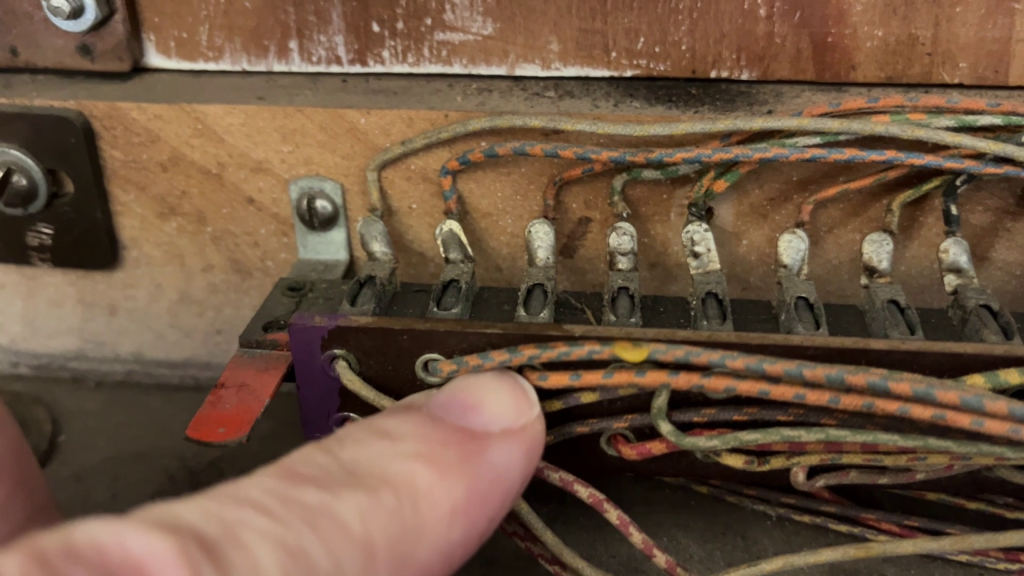
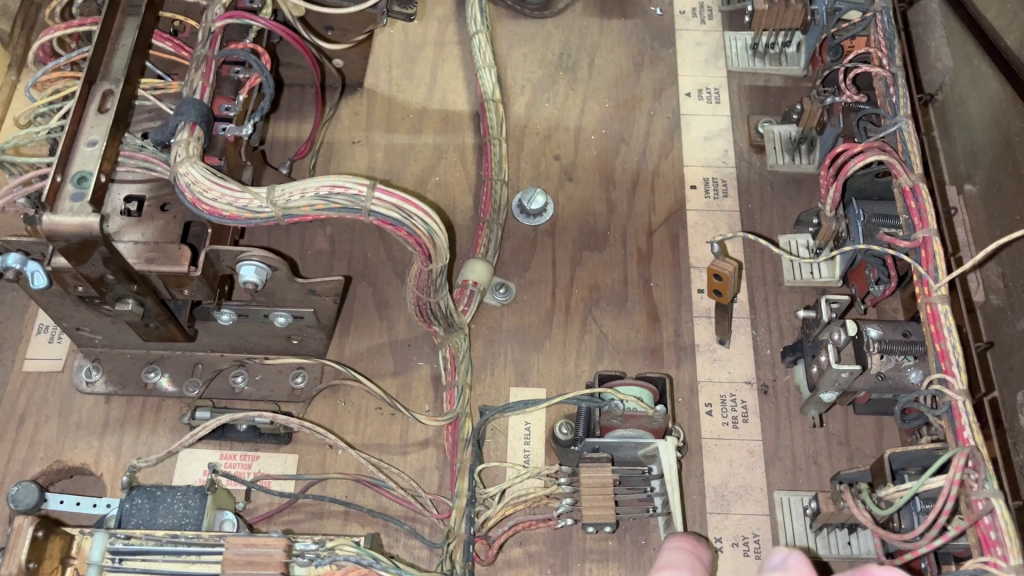
Next, I open the backbox to look for any loose wires or damaged components. The score relays often get beat up, so I always check to make sure they’re functioning smoothly. I also focus on connector pins—it’s easy to plug them in incorrectly, especially when dealing with machines that have been previously worked on.
One interesting discovery in this machine was that the backglass seemed to be swapped with a different one, suggesting some previous work or modifications. It’s important to note these things because they can influence how the machine operates later down the line.
Here’s a shot of the backbox wiring, which I adjusted to ensure the connectors matched up correctly.
Step 2: Check Fuses
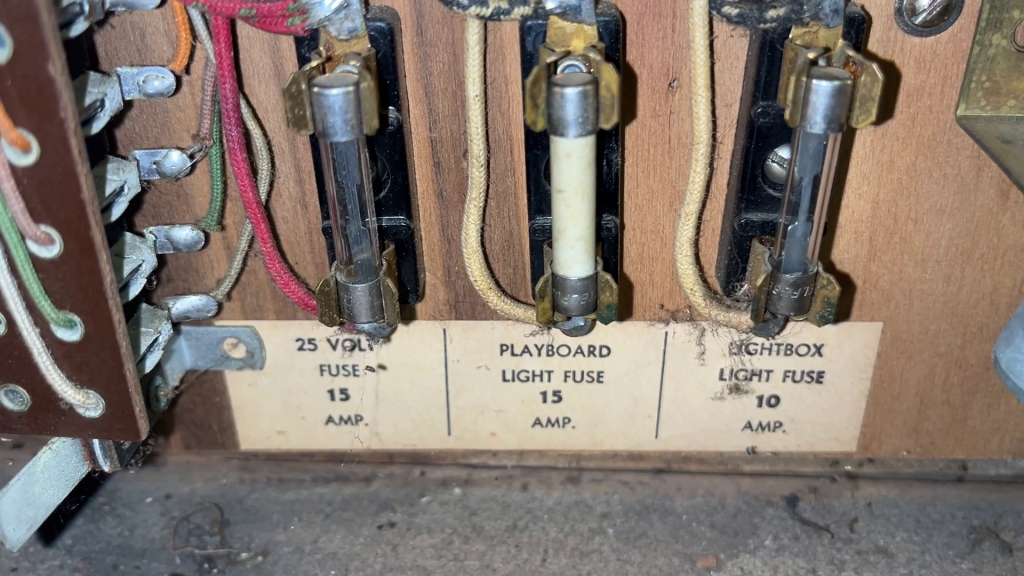
Once I’ve completed the visual inspection, I move on to the electrical components, starting with the fuses. I pull them out and use a multimeter to check for continuity and ensure they’re the correct amp rating. This is important to avoid any power surges or blown circuits while the machine is in operation.
In this particular game, I found a 20-amp fuse where a 15-amp fuse should have been, which could have been a major issue if left unchecked.
I also take this opportunity to inspect the tilt switches and power cord. One thing to always check is the soldering on the power connections. In this case, one of the connections was loosely attached, which I will need to fix before the machine is powered on.
For those interested in the flex fuses I use, they’re incredibly versatile and allow me to pop them in and out easily while troubleshooting. If you’re working on a machine that’s giving you electrical issues, these can be a real time-saver and money-saver.
Step 3: Inspect Mechanical Components
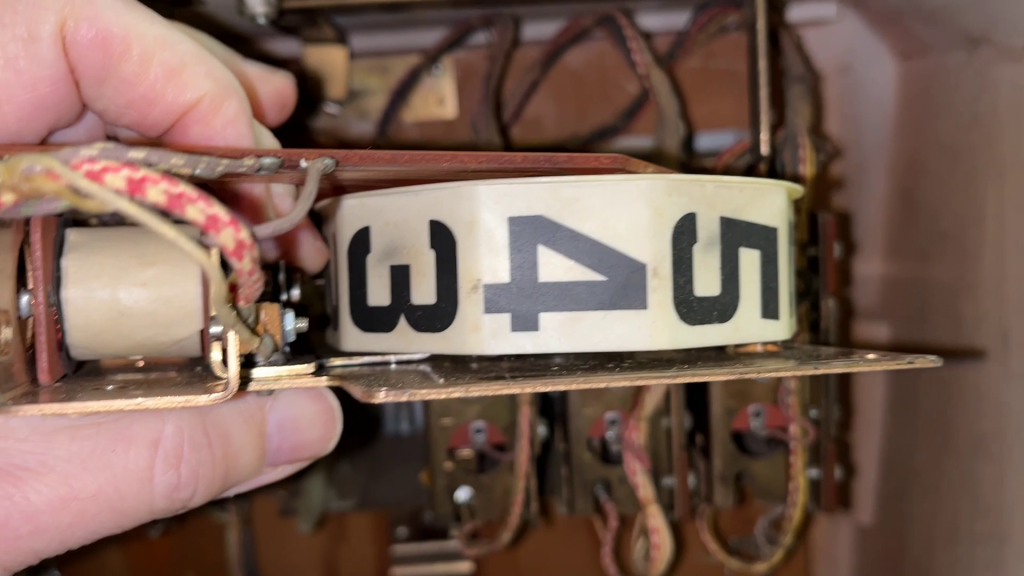
By now, I’m ready to check the mechanical components. I haven’t powered the machine up yet, so this is all about manually engaging components like the plungers, relays, and reset banks. This is where you really start to get a feel for how the game is functioning mechanically.
I give a quick push to some of the relays and units to see if they’re advancing and resetting correctly. During this phase, I noticed a sluggish spin control relay, which I’ll need to clean and adjust to get it moving freely again. A little bit of grime can sometimes be the cause of this, so it’s worth checking thoroughly.
Step 4: Test the Machine’s Start-Up Sequence
When powering on the machine for the first time, pay close attention to its behavior. If it doesn’t fully start up, you can manually adjust some components to help it along. Begin by checking the score reels to ensure they are set to zero and resetting the stepper units to their home position. Sometimes, if these parts are out of alignment, the game won’t start properly, and adjusting them can give you a clue about what might need further attention.
It’s also essential to confirm that there are credits on the game. Without at least one credit, the machine won’t proceed to the next step of the startup sequence. If you’re still having trouble, lift the playfield and locate the start relay. Manually activating this relay can force the score motor to spin and the reset bar to engage. This simple step often helps identify whether the issue lies in the startup circuit.
Once the game begins to show signs of life, you can simulate a ball being played to test other features. For example, you can manually engage the ball mechanism to see if it kicks into play. While the machine is running, test the flippers, bumpers, and other playfield features to ensure they’re working as expected. If certain elements aren’t functioning, this is the point to take note and identify specific areas for further troubleshooting.
Step 5: Dive Deeper
If the machine still doesn’t respond after initial checks, it’s time to dive deeper. Examine the switch stacks carefully, as loose screws or small gaps in the switches can interrupt circuits. Tighten or adjust these as needed, but be cautious and avoid making haphazard changes that could cause additional issues. If you have the schematics for the machine, now is the time to consult them. Many manuals include a detailed startup sequence that can guide you in pinpointing where the problem might lie. If you don’t already have the schematics, they’re a worthy investment and often essential for troubleshooting.
As you work through these steps, staying organized is crucial. Label any wires, screws, or parts you remove, and keep them sorted in containers or bags to make reassembly easier. Taking photos of the machine before and during disassembly is another invaluable practice. Even if you plan to return to the repair quickly, unforeseen delays can occur, and those photos will help you remember how everything fits together.
Safety is always a priority when working on pinball machines. Make it a habit to unplug the machine before performing any electrical work, plugging it back in only for testing purposes. This simple precaution can prevent accidents and protect both you and the machine.
If you’re still stuck, don’t hesitate to seek help. There are a number of places to help troubleshoot a pinball machine. I have an online course that helps with repairs and reading schematics. There are excellent online groups such as EM Pinball Tech group on Pinside and the EM Pinball groups on Facebook. These communities are filled with experienced enthusiasts who can offer guidance and support.
In Conclusion:
This is just the start of what can often be a long and involved process when you troubleshoot a pinball machine, but taking these initial steps ensures that the machine is in good condition for more detailed work later on. If you’re interested in seeing the full walkthrough, feel free to check out the video below and download the checklist.
I’d love to hear your thoughts on the process! Share your comments or questions, and feel free to offer your own tips for restoring pinball machines.
Tilt-free troubleshooting ahead :)!

The head on my shirt shot does not light up. Is there any specific circuit I need to check or connection to make them work?
Steve – check the 7.5A and 10A fuse that feeds the lights to the backbox. Also check H relay as that powers on/off some of the lights.